Requirements
Before installing Yendif Video Share, please ensure your Joomla installation meets the following requirements:
- Joomla 4.X or 5.X
- PHP 7.2.5 or higher
- JQuery 1.7.1+
Installing Yendif Video Share
1. Download the Yendif Video Share component
2. Log into your Joomla admin.
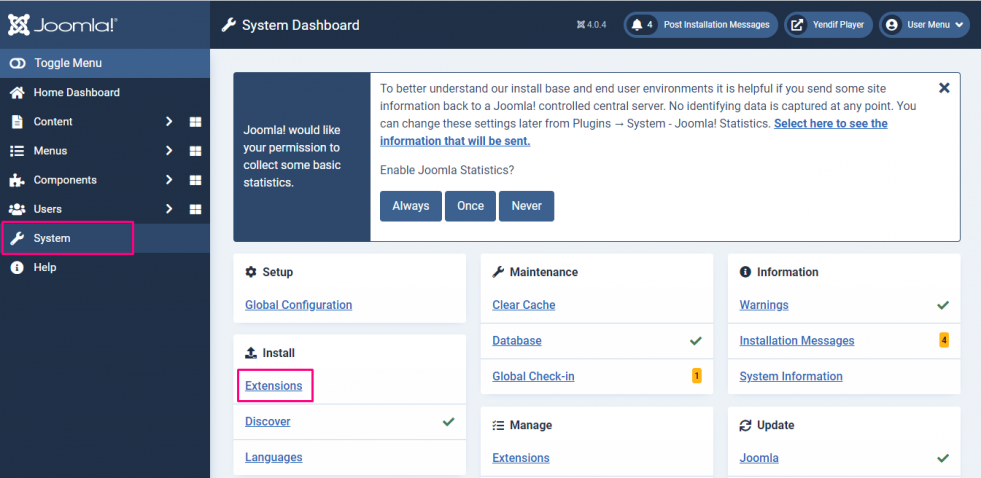
3. In your Joomla admin, click "System --> Install --> Extensions"
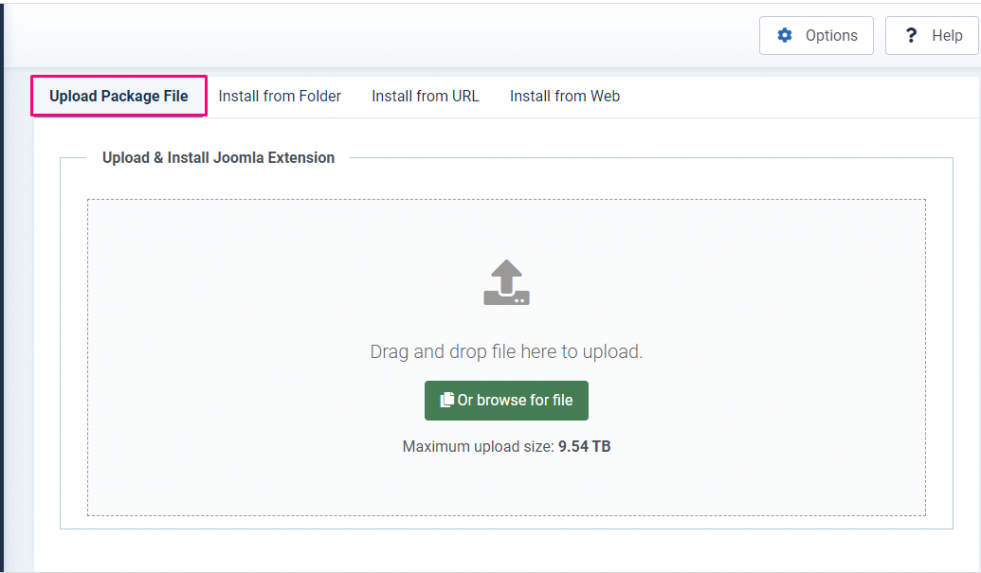
4. Be sure you are in the Upload Package File tab.
5. Follow the on-screen instructions to upload the file by dragging and dropping or browsing for the file that you downloaded in step 1.
6. You should see an installation of the library was successful message.


Congratulations, you have just installed the Yendif Video Share component, modules, and plugin!
What next? How does it work?
Note: Are you just looking to add a single video to your article page using direct video paths? If yes, you can omit the following sections and jump directly to Using the Player Plugin.
1. Login to your Joomla admin
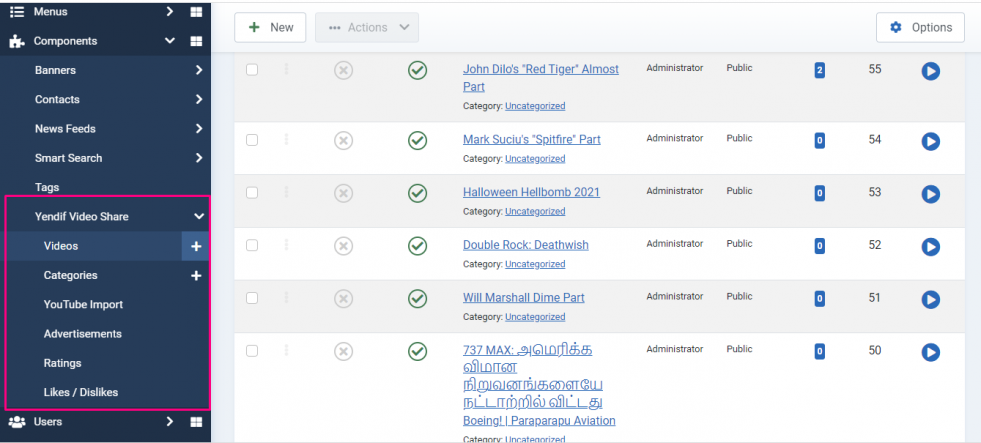
2. Select "Yendif Video Share" from the "Components" menu. You should see several submenus related to the component as listed below,
- Videos – Menu in which we upload and manage our videos
- Categories – Menu in which we create categories
- Youtube Import – Menu in which we manage the Automatic youtube Imports
- Advertisements – Menu in which we manage the user uploaded advertisement for videos
- Ratings – Menu in which the video ratings are listed.
- Likes/Dislikes - Menu in which we manage the Likes and Dislikes

Step 1: Adding categories
Assume that you have more than a hundred videos in your database. In such cases, it's not much easy to manage all your videos without categorization. So, we have made categorization to be mandatory before adding your Videos. It means all your videos must be added to a category. So, the first step is to create a category. Read more
Step 2: Adding videos
After creating a category, you can just go to the Videos menu and start adding your video selecting the New button. Using the Yendif Video Share Video form, either you can upload the video from your local hard disk or just add the direct video URL which already exists in your server. Additionally, it can accept YouTube video URLs or embed code of any third-party video-sharing website. Read more
Step 3: Configuration
This section allows you to "style the player", "enable or disable player controls", "setting user permissions" and more. Read more
Step 4: Deploying to the front-end
We have created categories, added videos, and done some configurations. Now, this is the time to add the player or gallery to the site front-end for the user experience.
Front-end deployment can be done in 3 ways,
- Using "Yendif Video Share" menu layouts. Read more
- Using "Yendif Video Share" Gallery/Player modules. Refer using Player Module, Videos Module
- Using "Yendif Video Share" content plugin. Read more
Still, having issues? You can either post your query in our forum section or mail it directly to This email address is being protected from spambots. You need JavaScript enabled to view it.. All your queries will be replied to within 24 hrs.