Before installing the Yendif Player plugin, please ensure your WordPress installation meets the following requirements:
- WordPress 3.5.1 or higher
- PHP 5.0 or higher
- JQuery 1.7.1+
This guide is another in the Inside WordPress series and will show you how to install a WordPress plugin. While this is a relatively simple task it is one of fundamental importance to WordPress and is often overlooked.
Yendif Player WordPress Plugin can be installed in 3 easy methods
- Using WordPress Admin Panel Search Option
- Using Upload Method in WordPress Admin Panel
- Using FTP Manager
1. Using WordPress Admin Panel Search Option
This is by far the easiest way of installing a WordPress plugin. First go to your WordPress Admin Panel and click on Plugins » Add New

You will see the screen like the one in above screenshot. Type in the plugin name "Yendif Player", like we did and click "Search Plugins" button.
Now, you will see a listing that shows our plugin. Just select "Install Now" link and press "OK" to confirm the action. Once you confirmed, the plugin will be installed, and you will see something like below:

Make sure that you click on Activate the plugin, now you have installed the WordPress plugin.
At this point, three main links are visible: "Settings", "Deactivate" and "Edit".
Settings : This is where you can set the basic things about our plugin. Usually, it’s where you start working with a plugin.
Deactivate : You can deactivate your plugin if you don’t want to use it anymore.
Edit : It's not advisable to go there if you’re a beginner. This is the place where you can edit the source code executed by a given plugin.
That’s it. Your new plugin is up and running !
2. Using Upload Method in WordPress Admin Panel
First you would need to download the plugin, then go to your WordPress admin panel. Click on Plugin » Add New. Then click on the Upload Tab.

You will see a screen like the one above. Browse the downloaded zip file and upload it. You will be taken to the activate a plugin page just like this one:

Make sure that you click on Activate the plugin, now you have installed the WordPress plugin.
At this point, your new plugin is active and ready to be used, and the same three links (Settings, Deactivate, Edit) are displayed under the plugin’s name.
3. Using FTP Manager
For this step, you’ll need a piece of FTP (file transfer protocol) software to transfer the files to your blog hosting directory. Thankfully, there are some free ones, like FileZilla.
Before you can use FTP, you need to download the plugin and extract it to a location on your hard drive.
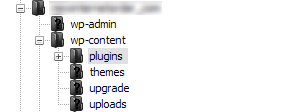
Now, in your FTP software connect to your site (your host will be able to give you the details you ned to be able to do this) and navigate to the wp-content/plugins directory.

Next, upload everything that has been extracted from the plugin’s ZIP file to that location.
Once you upload the plugin via FTP, you should see it listed in the Plugins section of your WordPress admin panel. But this time it’s deactivated.

The only thing left for you to do now is activate it. Simply click the Activate link, as shown above.
At this point, your new plugin is active and ready to be used, and the same three links (Settings, Deactivate, Edit) are displayed under the plugin’s name.
What next ? Plugin Reference