This guide takes you from a fresh download to a working video gallery on your Joomla site. Follow it from top to bottom and you will be finished in about ten minutes.
What you will build
By the end of this guide your site will have a video gallery page. Visitors see your categories as a grid, click one to browse the videos inside it, and click a video to watch it on its own page — with a title, description and related videos underneath.
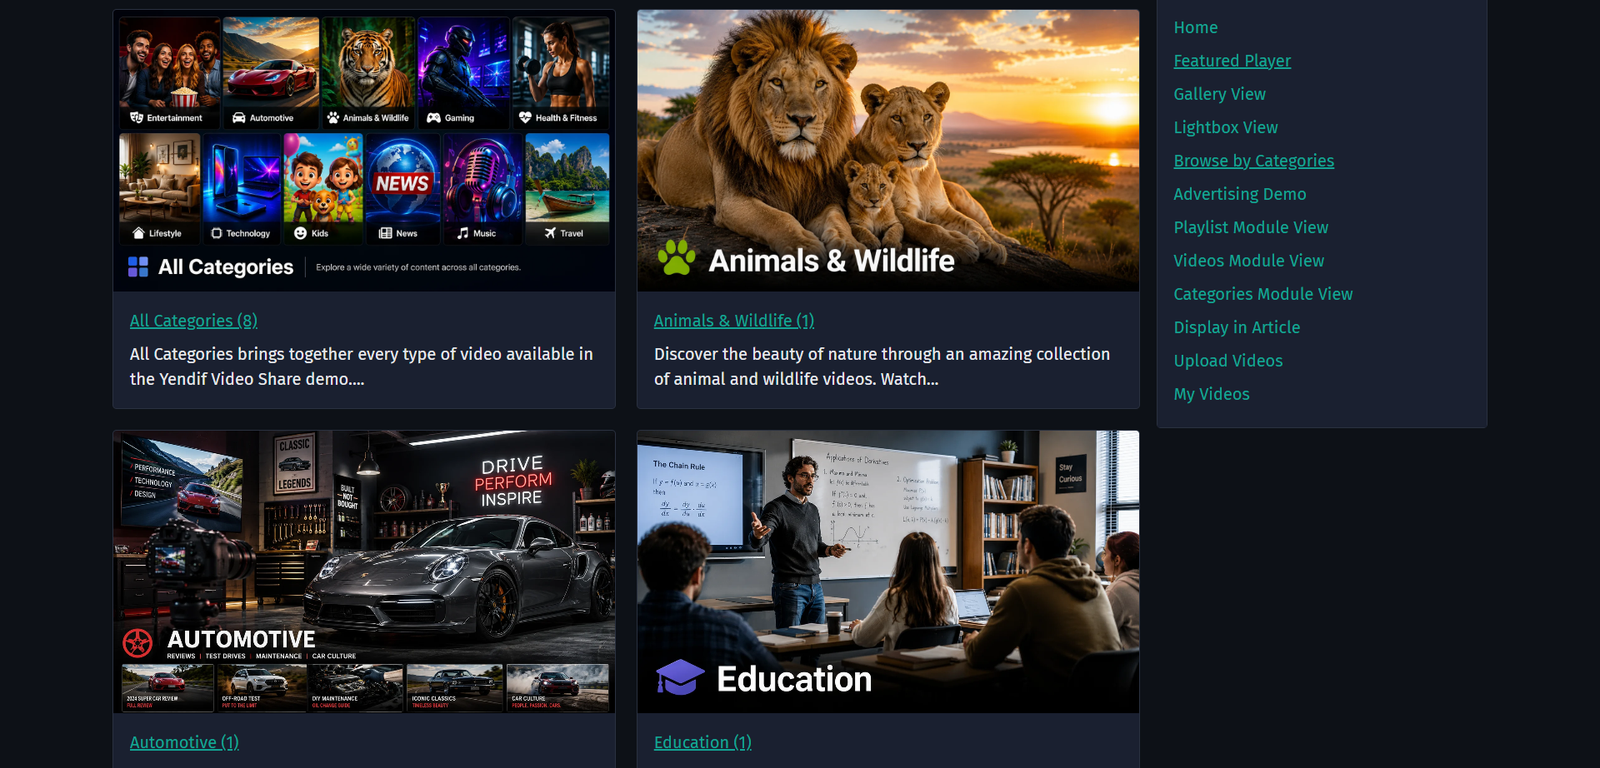
Six steps get you there:
- Install the extension
- Add your license key
- Create a category
- Add your first video
- Put the gallery on your site
- Check that it worked
Before you start
You will need:
- Joomla 4.4 or newer — Joomla 4, 5 and 6 are all supported
- PHP 7.4 or newer
- Administrator access to your Joomla backend
- The package file —
pkg_yendifvideoshare_2.3.0.zip, from your account - One video to start with — a YouTube link is the quickest, or an MP4 file
Keep your Joomla admin open in one browser tab and this page in another, so you can follow along as you go.
Step 1: Install the extension
Yendif Video Share comes as a single package. Installing it adds the component, six modules and three plugins in one go, so there is only one file to upload.
1. Log in to your Joomla backend.
2. Select System → Install → Extensions.
3. On the Upload Package File tab, drag pkg_yendifvideoshare_2.3.0.zip into the upload area.
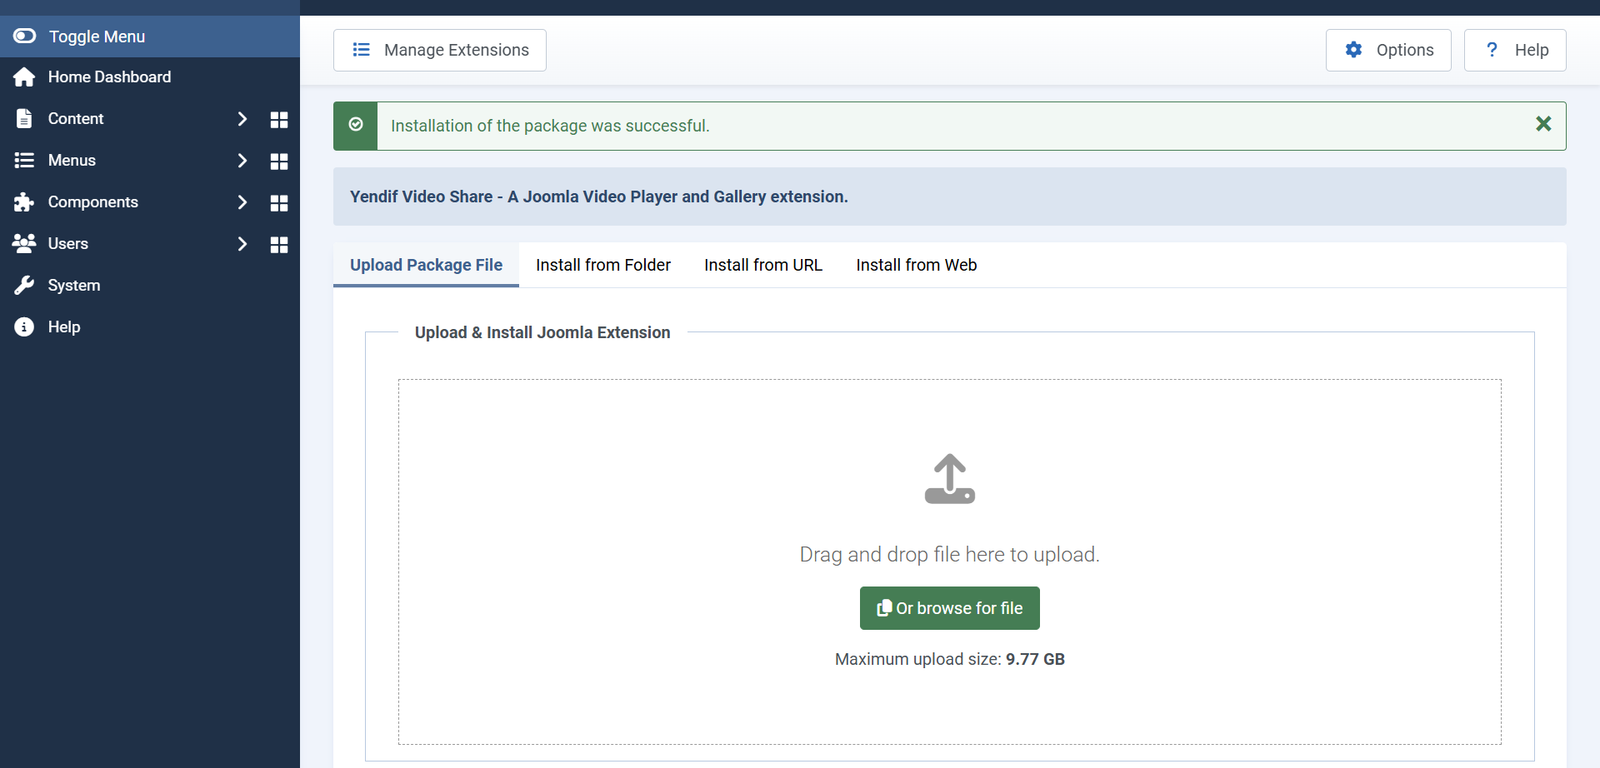
4. Wait for the green success message.
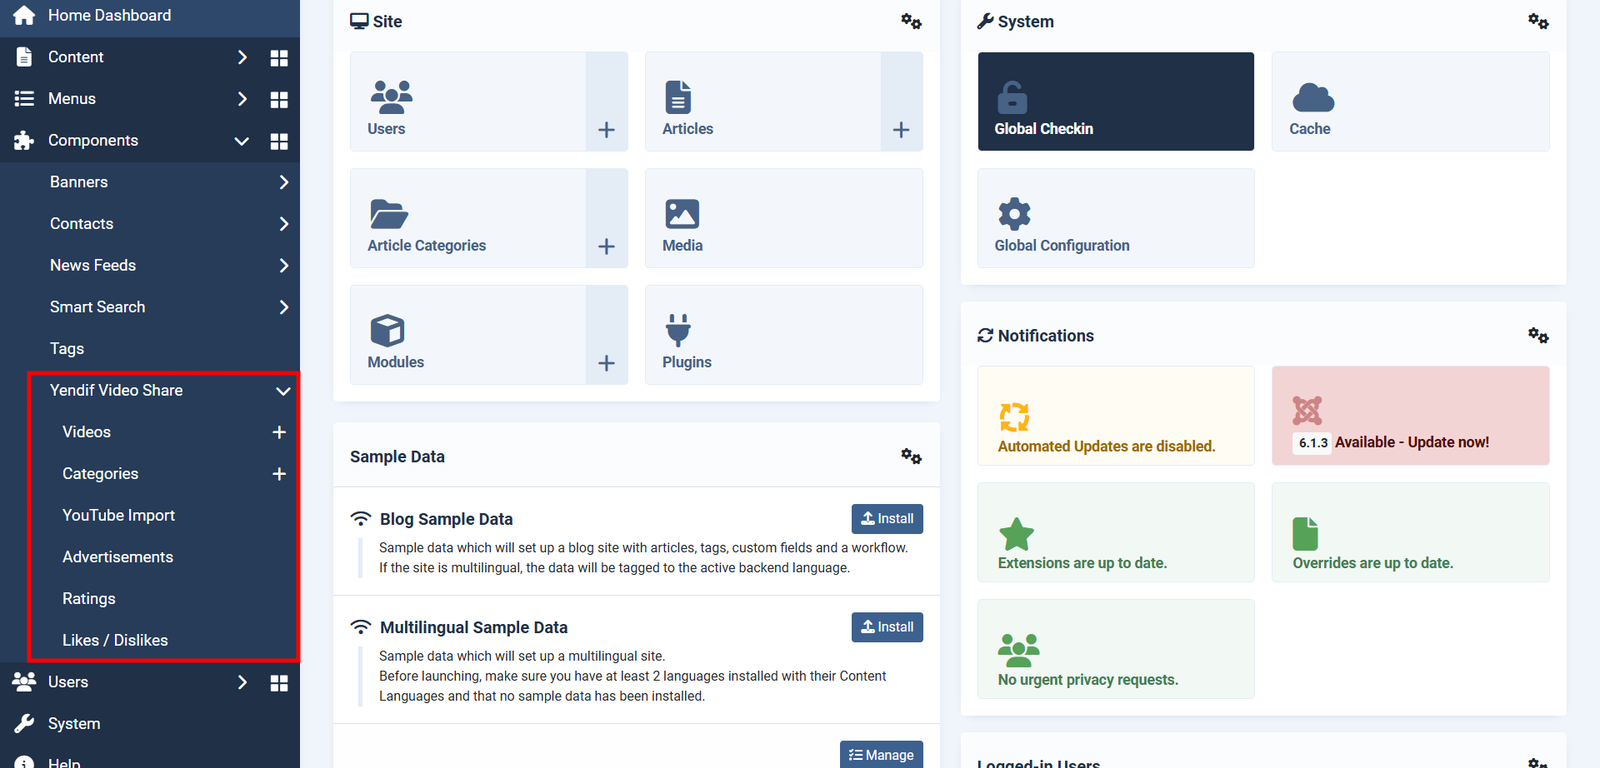
Check it worked: open the Components menu. You should now see Yendif Video Share in the list, with six entries inside it — Videos, Categories, YouTube Import, Advertisements, Ratings and Likes / Dislikes.
Install the package, not the individual component and module files inside it. The package installer creates the database tables, switches on the three plugins for you and registers the update server so Joomla tells you about new releases.
Step 2: Add your license key
Do this now rather than later. Several features stay switched off until the key is in place, and it is confusing to hunt for a missing button that was never enabled.
1. Select Components → Yendif Video Share → Videos.
2. Click Options at the top right corner.
3. Open the Licensing tab, paste your key into License Key, then click Save & Close.
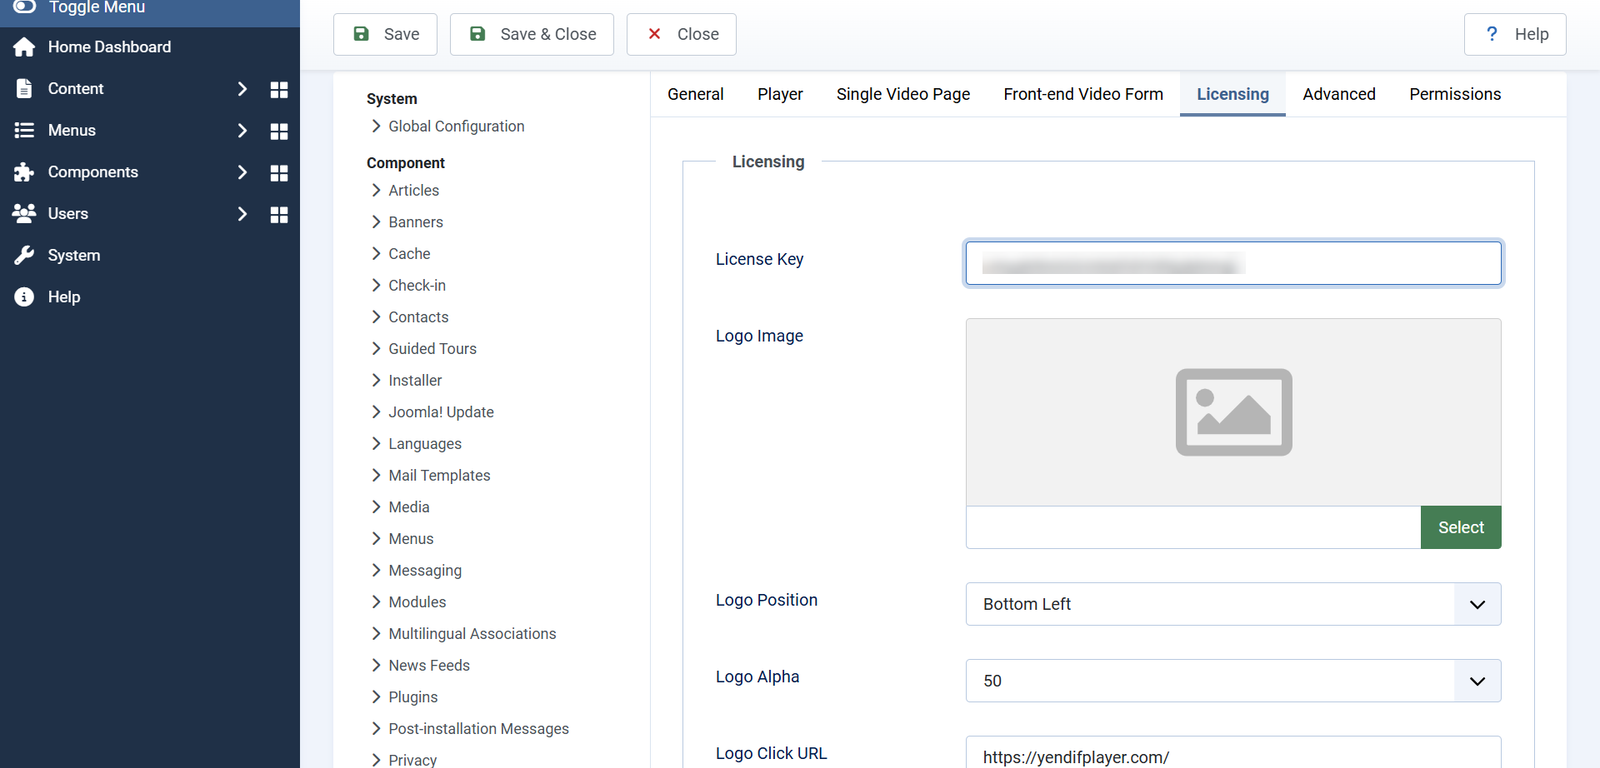
Check it worked: open any video on the front end of your site and look at the bottom left corner of the player. If an orange Powered by Yendif badge is there, the key is not being accepted. If there is no badge, the key is working. For the full checks and what to do if the badge stays, see Add your license key.
No key yet? Carry on. The extension works without one, and you can add the key at any time. These features stay switched off until you do: the embed, share and download buttons, popup playback, star ratings, likes, advertisements and YouTube import. Full details on Add your license key.
Step 3: Create a category
Every video belongs to a category, so you need one before you can add a video. Categories are how your gallery is organised, and they become the top level of what your visitors browse.
1. Select Components → Yendif Video Share → Categories → New.
2. Type a Title — for this guide, use Tutorials.
3. Leave Parent as — Root — so this becomes a top level category.
4. Click Save & Close.
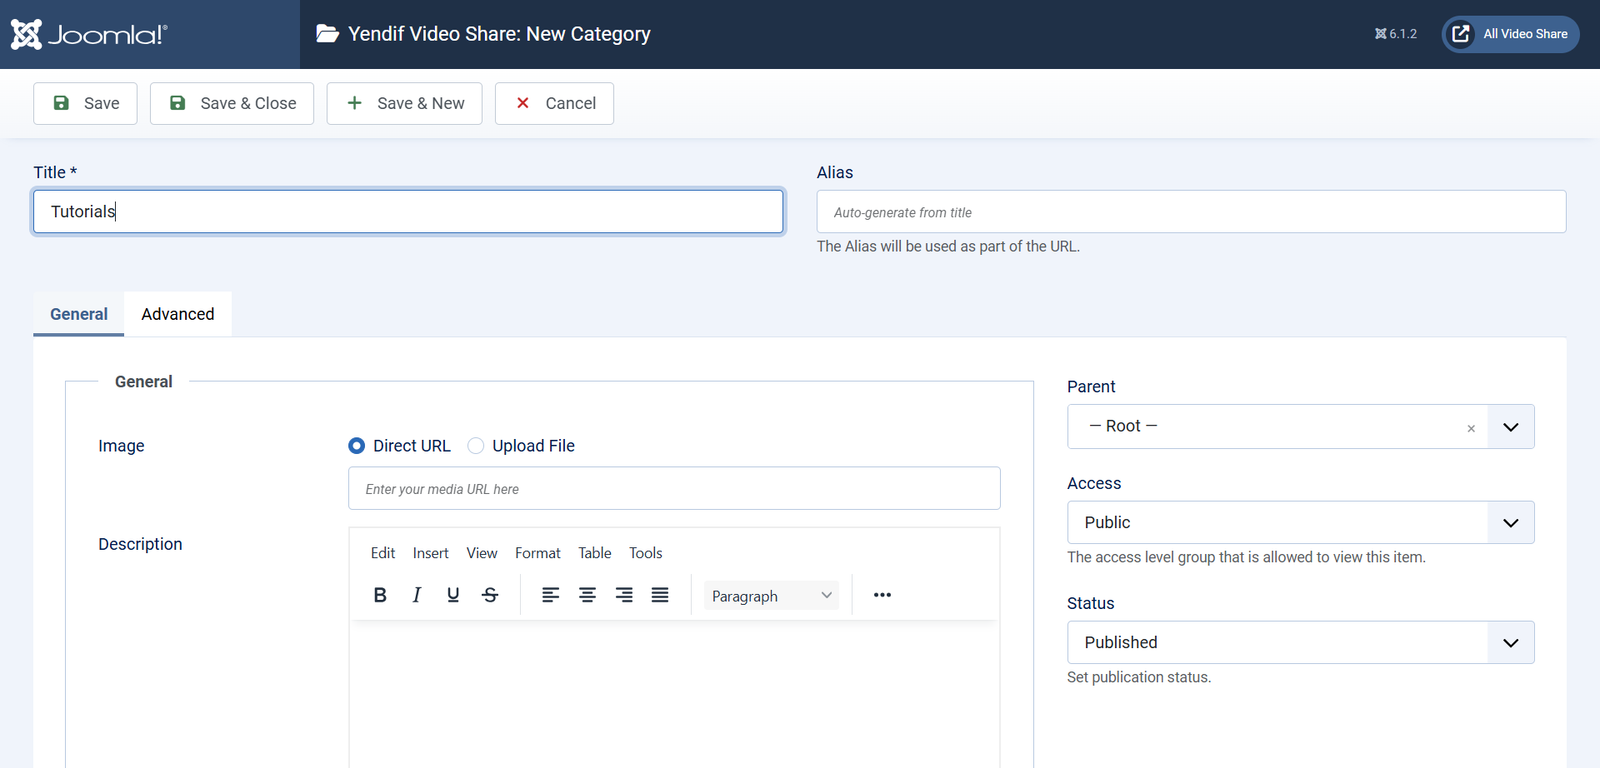
That is all you need for now. Everything else on the form is optional — you can come back and add an image, a description and meta tags once your gallery is live.
Check it worked: the Categories list now shows Tutorials with a green tick in the Status column.
Planning a bigger library? You can nest categories as deeply as you like by setting a Parent. One thing worth knowing early: the video count shown on a category tile includes that category and every category beneath it, so a parent that holds no videos of its own still shows a total.
Step 4: Add your first video
1. Select Components → Yendif Video Share → Videos → New.
2. Type a Title for your video.
3. Choose your Source Type. The form immediately hides every field that does not apply, so you only see what you need.
- On YouTube? Choose YouTube, then paste the full YouTube URL. The thumbnail is fetched for you.
- On Vimeo? Choose Vimeo, then paste the full Vimeo URL. The thumbnail is fetched for you.
- A file you host yourself? Choose Self Hosted / External URL, then paste the file URL — or switch to Upload File and upload it.
- A live or adaptive stream? Choose HLS / MPEG-DASH, then paste your HLS playlist URL.
- From another service entirely? Choose Iframe Embed Code, then paste the embed code that service gave you.
4. On the right hand side, set Select Category to Tutorials.
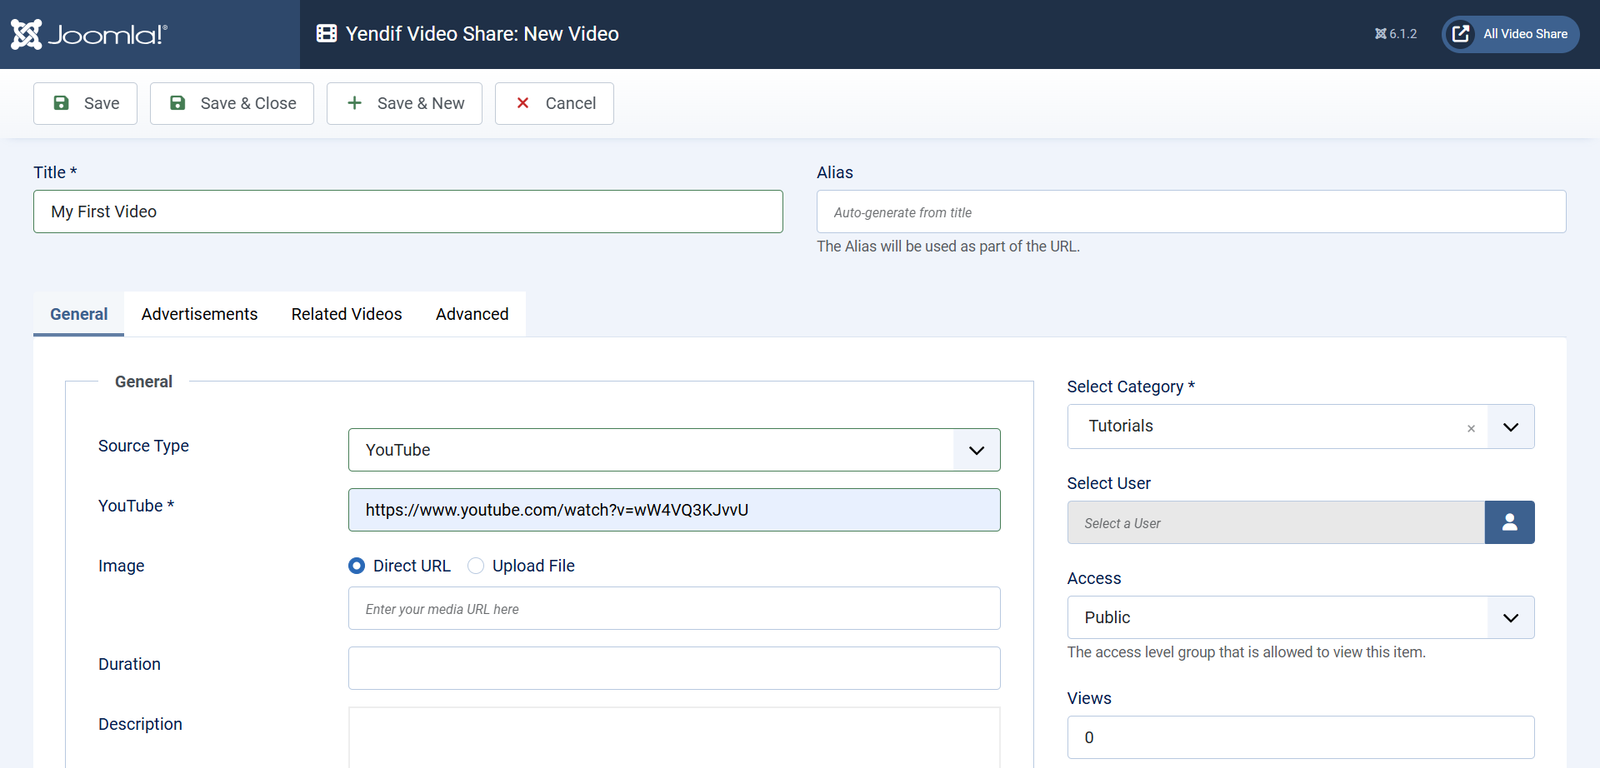
5. Click Save & Close.
Check it worked: your video appears in the Videos list with its thumbnail. If you added a YouTube or Vimeo video and the thumbnail is there, the connection to that service is working correctly.
Everything else on the video form is optional and can wait: duration, description, access level, featured flag, related videos and meta tags. They are all covered in the settings reference.
Uploading a large file? Browser uploads are limited by your server’s PHP settings. For anything over a few hundred megabytes it is faster and more reliable to upload the file by FTP, then paste its URL into the Direct URL field instead.
Step 5: Put the gallery on your site
Your video exists, but nobody can see it yet. Joomla only shows a component when a menu item points at it — so this step creates two menu items.
Two, because your visitors move through two kinds of page: a gallery they browse, and a page where they watch a video. The first item is the gallery. The second is where a video opens when they click a thumbnail.
Create the gallery page
1. Select Menus → Main Menu → Add New Menu Item.
2. Type Videos as the Title.
3. Click Select beside Menu Item Type, then choose Yendif Video Share → Categories Layout.
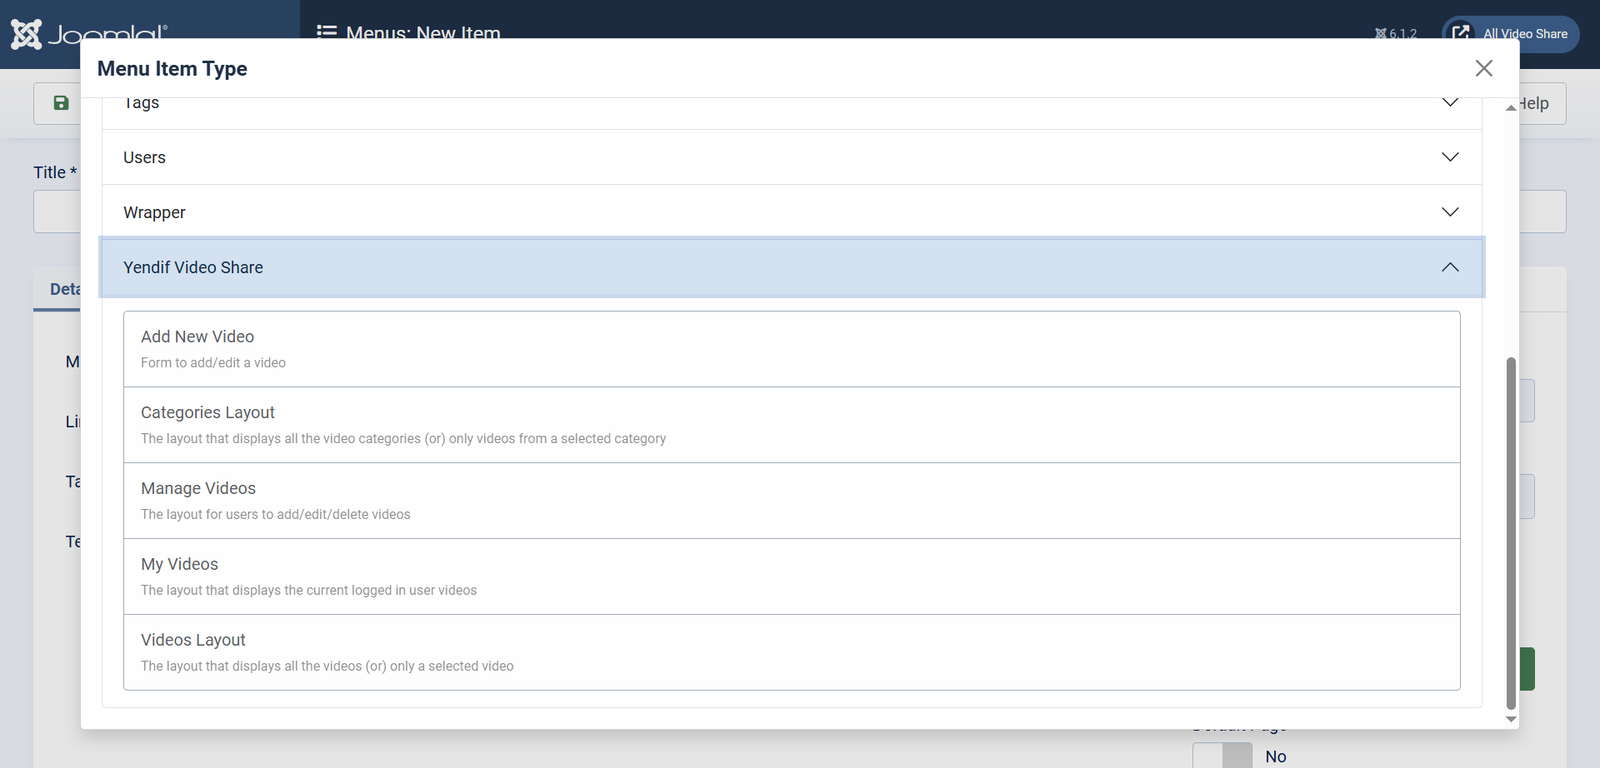
4. Leave Select Category empty. This makes the page show your whole category tree rather than jumping into one category.
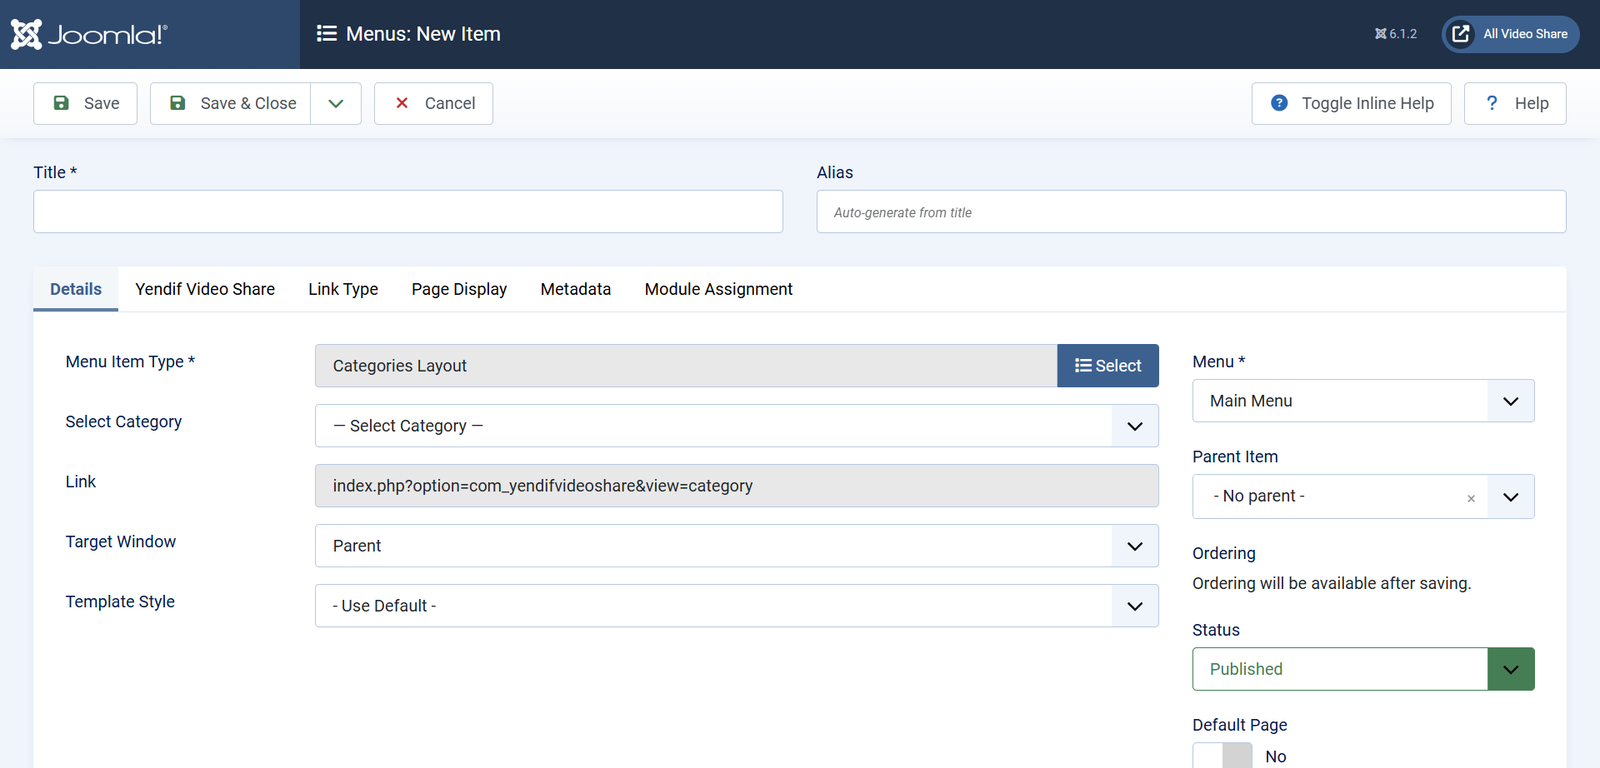
5. Click Save.
Create the video page
6. Select Menus → Main Menu → Add New Menu Item again.
7. Type Watch as the Title.
8. Choose Menu Item Type → Yendif Video Share → Videos Layout.
9. Leave Select Video empty, then click Save & Close.
Tell the component which pages to use
This last part takes thirty seconds and saves a lot of confusion later. It tells the component which of your menu items each kind of link should open.
10. Go back to Components → Yendif Video Share → Videos and click Options.
11. Open Advanced → SEO and set both of these, then click Save & Close.
- Category Menu — set it to your Videos menu item, the Categories Layout one.
- Video Menu — set it to your Watch menu item, the Videos Layout one.
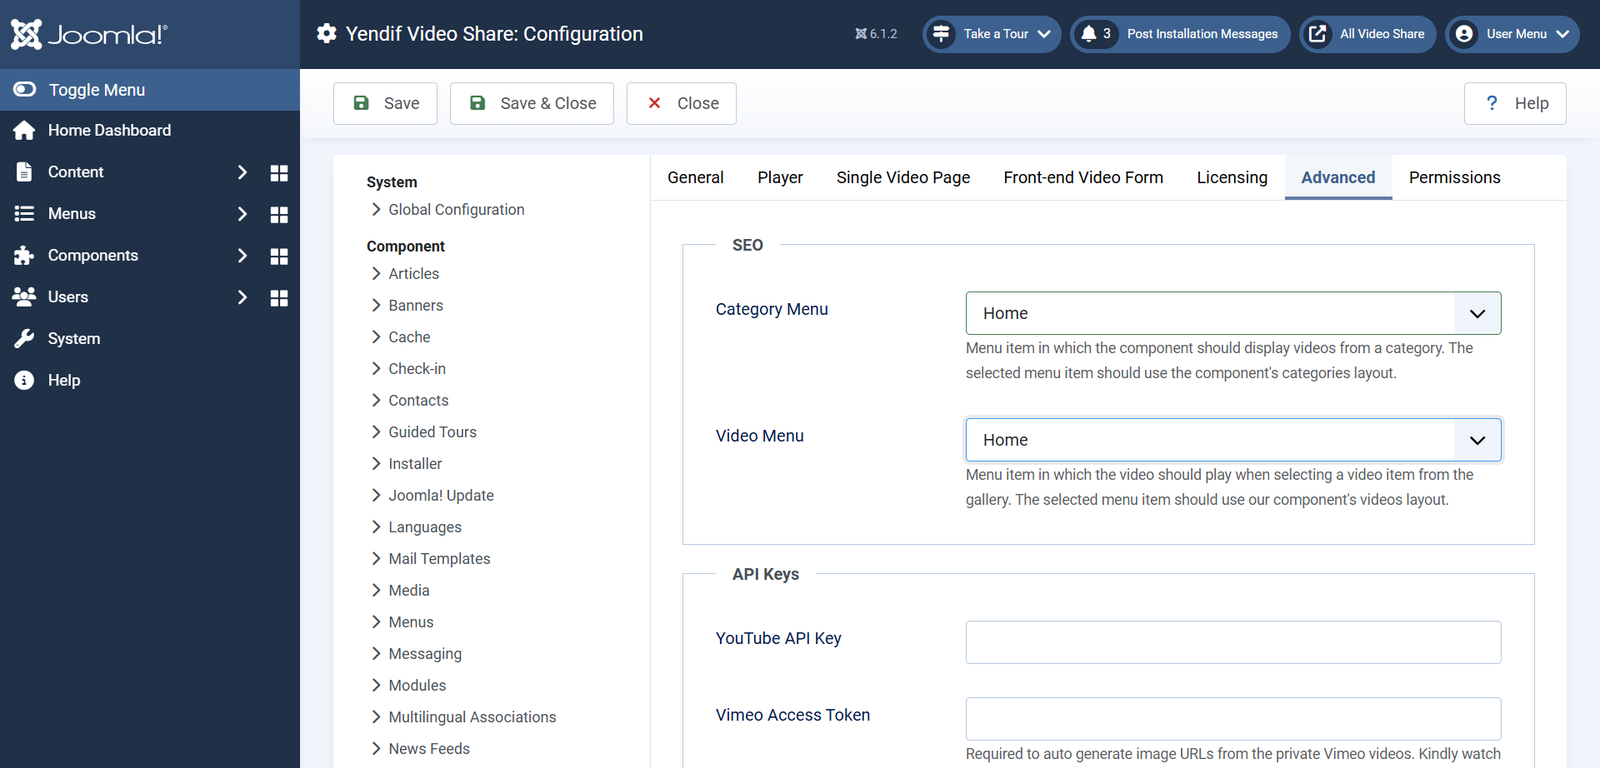
Both settings are set to — Autodetect Menu Item — out of the box, which works but leaves the component to guess. Once you have more than one Yendif menu item, guessing can send visitors to the wrong page — under the wrong template, with the wrong modules beside it. Naming the two items removes the guesswork.
You probably do not want Watch showing in your navigation, since visitors reach it by clicking a video rather than choosing it from a menu. Move it into a menu that is not published as a module and it disappears from view while continuing to work.
Step 6: Check that it worked
Open your site in a new tab and click Videos in your menu. You should see your Tutorials category as a tile, showing a count of one video.
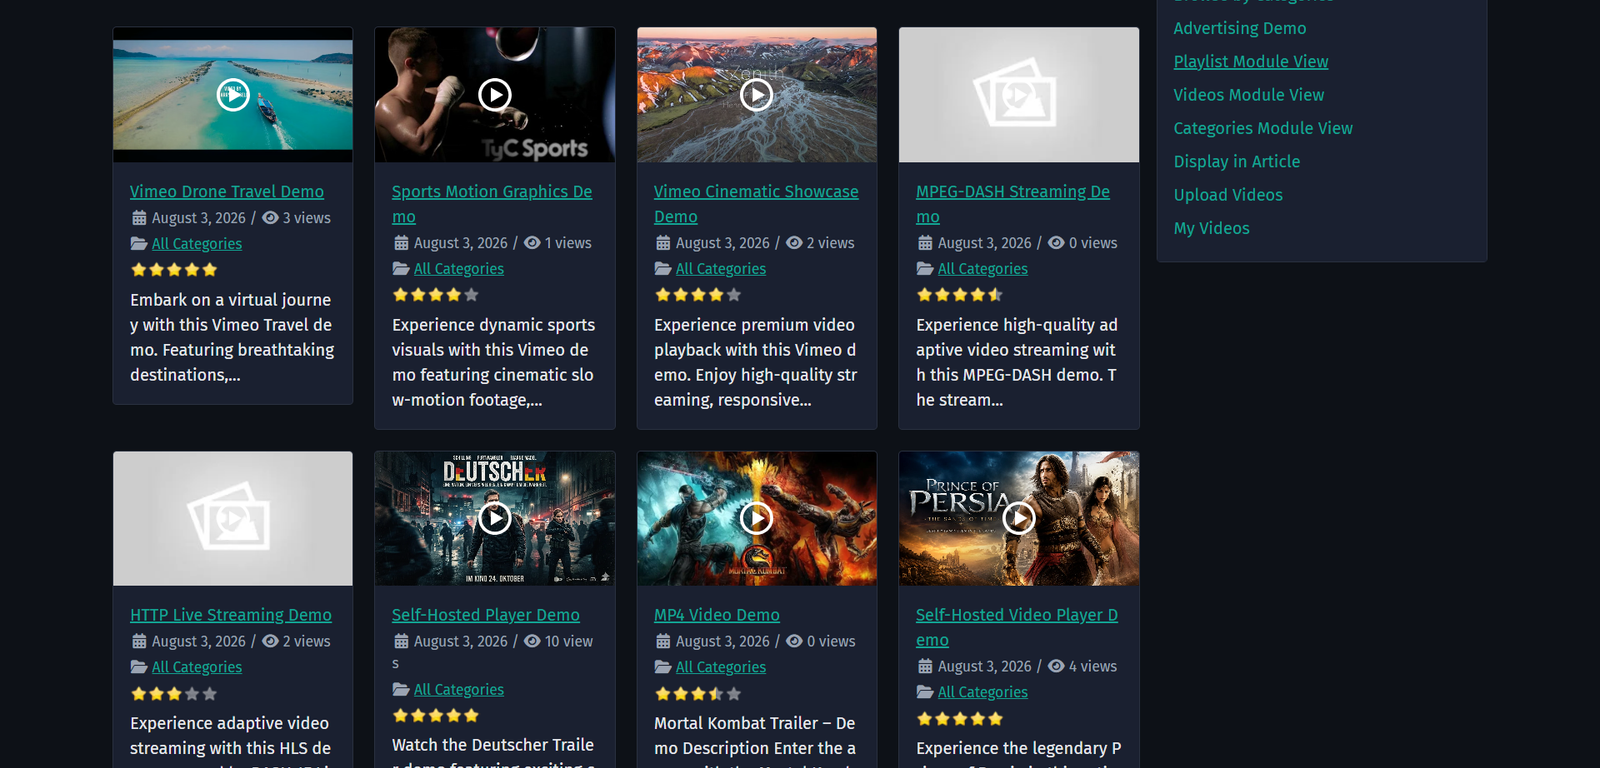
Click the tile and the video inside it appears. Click the video and it opens on its own page, with the player, the title and the related videos row.
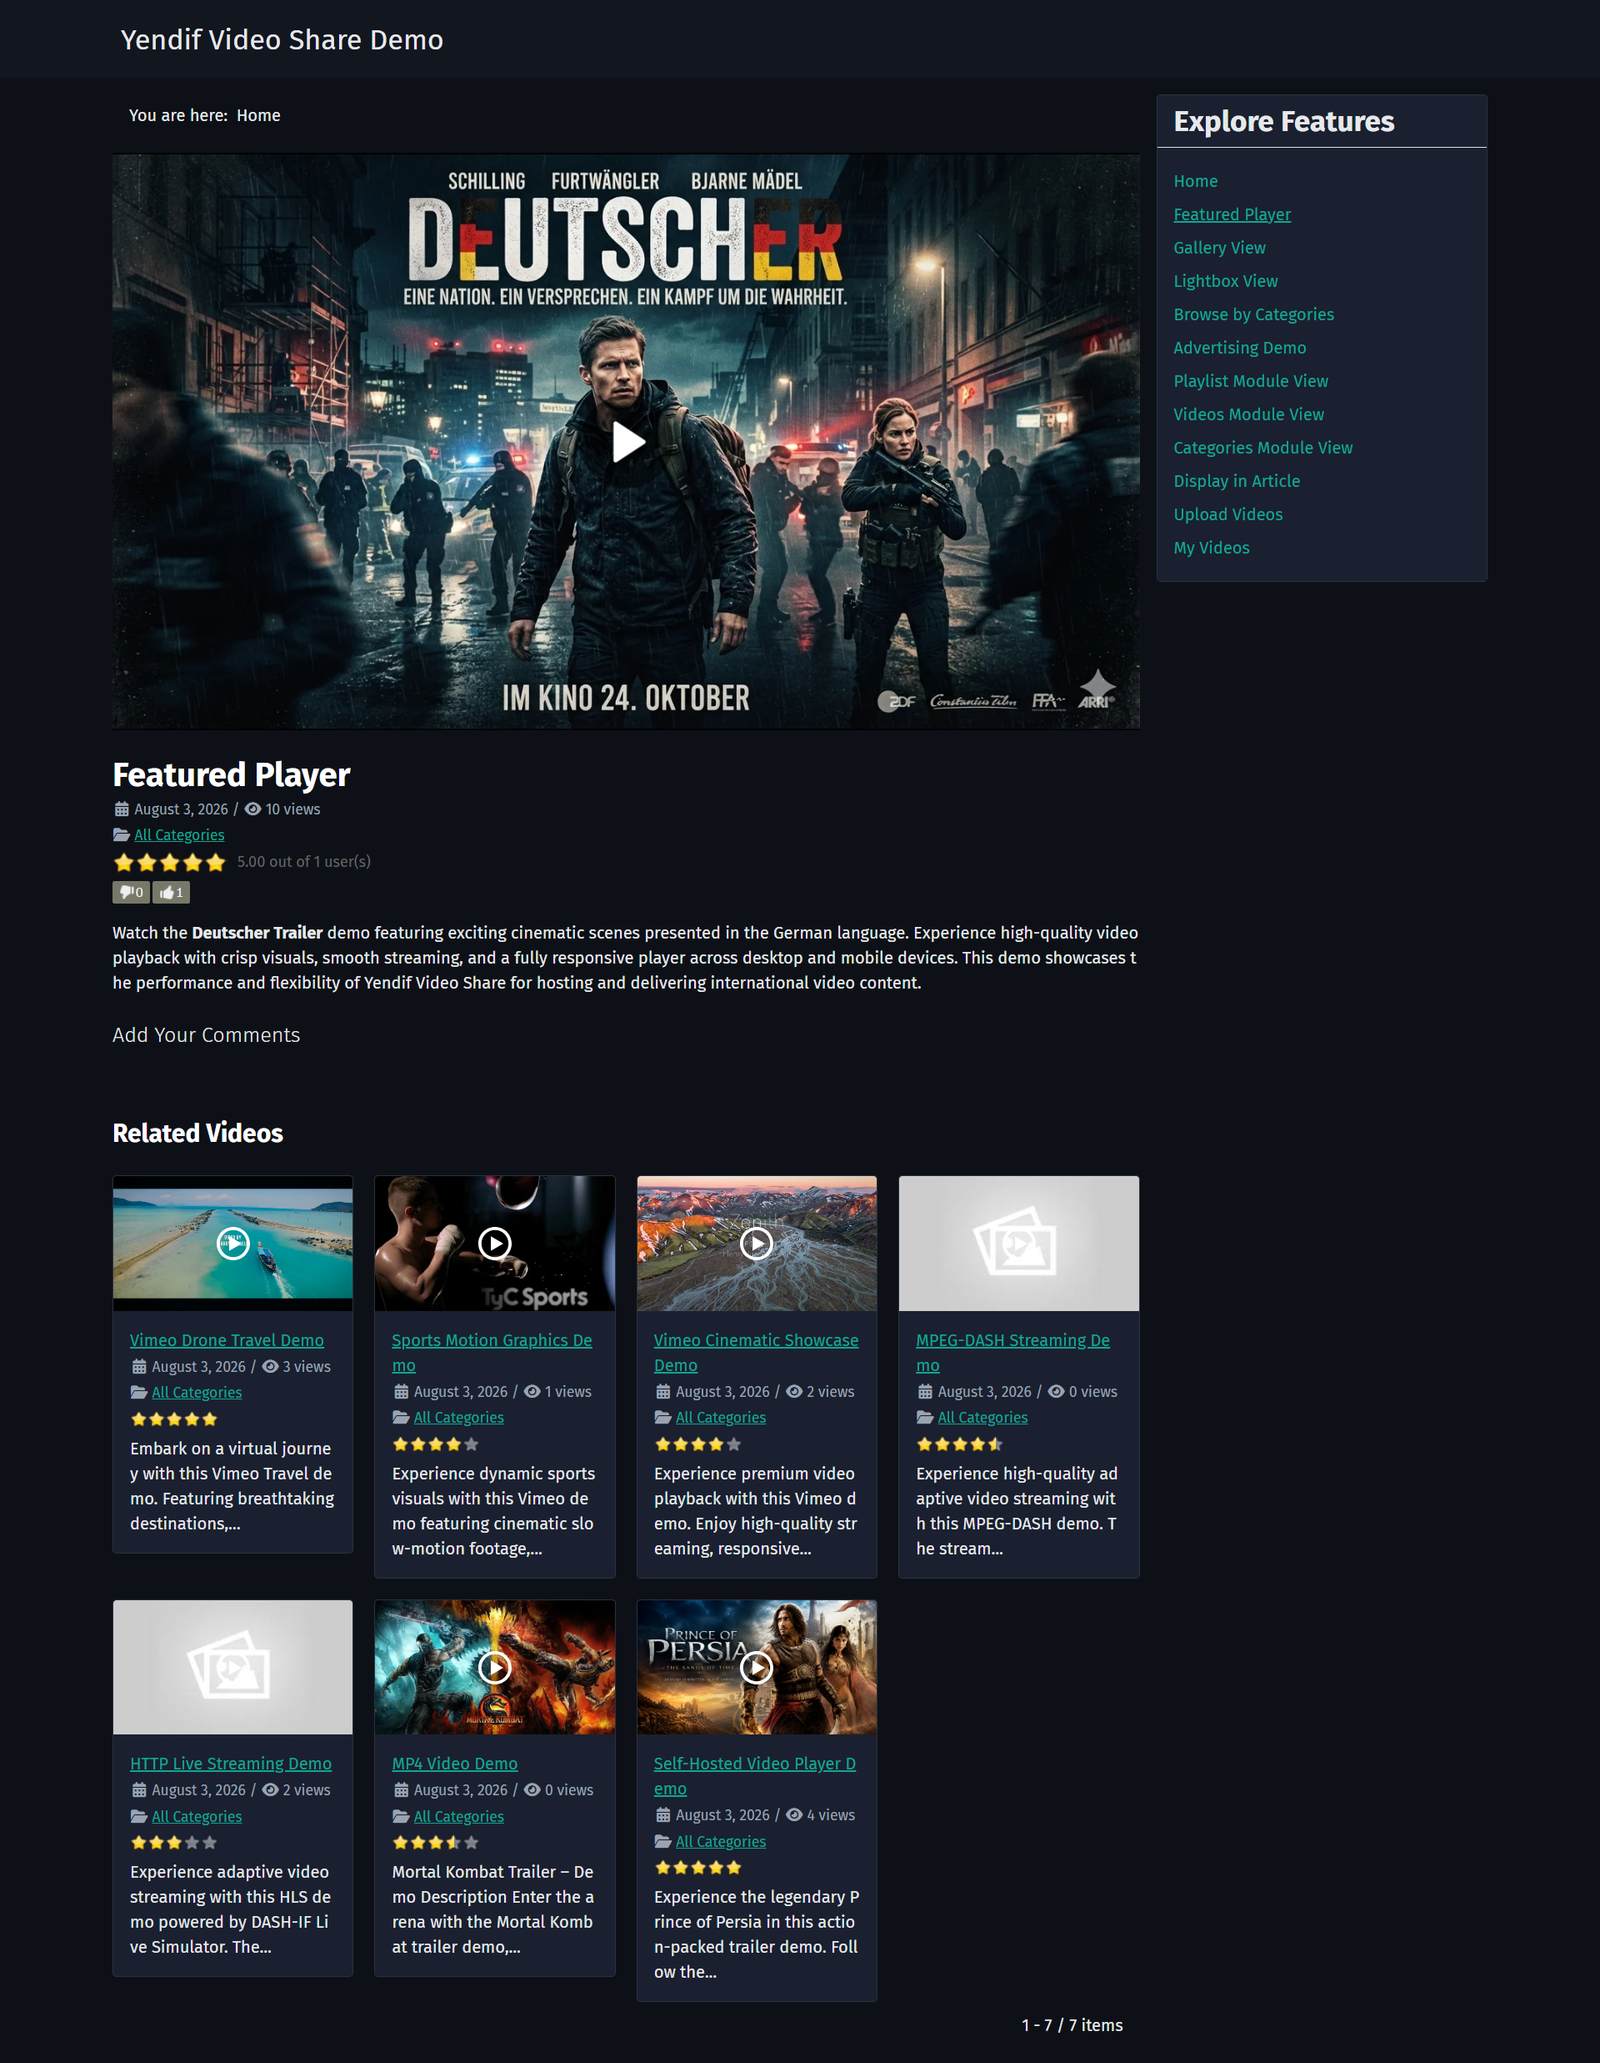
Congrats! You have a working video gallery. If something does not look right, the list below covers everything that commonly goes wrong at this stage.
- The page is empty. Your category or video is unpublished, or the video is in a different category. Check that both show a green tick in the Status column, and that the video’s category is Tutorials.
- Videos appear as a plain list, not a grid. Your Joomla template does not load Bootstrap 5 CSS. Go to Options → Advanced → Custom CSS and set Load Bootstrap CSS to Yes.
- A grey placeholder instead of a thumbnail. No thumbnail was found, which is normal for self hosted videos and streams. Add an Image to the video, or set a Default Image under Options → General → Gallery.
- The player is blank or will not play. The video URL is wrong, or the file is not reachable from the browser. Paste the URL straight into your browser’s address bar — if it does not play there, it will not play in the player.
- Clicking a video goes to the wrong looking page. The SEO menu settings are still on autodetect. Set Category Menu and Video Menu as described in step 5.
Still stuck? Troubleshooting covers more, and our support team is happy to help.
What to try next
Your gallery works. Here is what most people do next.
- Put videos on your homepage and sidebar
To show videos on your homepage or in your sidebar. - Add a video to any article or page
To drop a video into an article or any other page. - Move your YouTube channel onto your site
To fill your library from a YouTube channel in one go. - Change how your gallery looks
To change the number of columns, thumbnails or badges. - Set up the player how you want it
To turn player controls on and off, or add a watermark. - Let your members upload their own videos
To accept video submissions from your members. - Settings reference
To look up any setting in detail.