Your gallery page is not the only place your videos can appear. Two modules let you drop a grid of videos, or a grid of categories, into any position your Joomla template offers — a homepage feature row, a sidebar, a footer, or all three at once.
This guide sets up a row of videos on your homepage, then shows you how to reuse the same module in a narrow sidebar.
What you will build
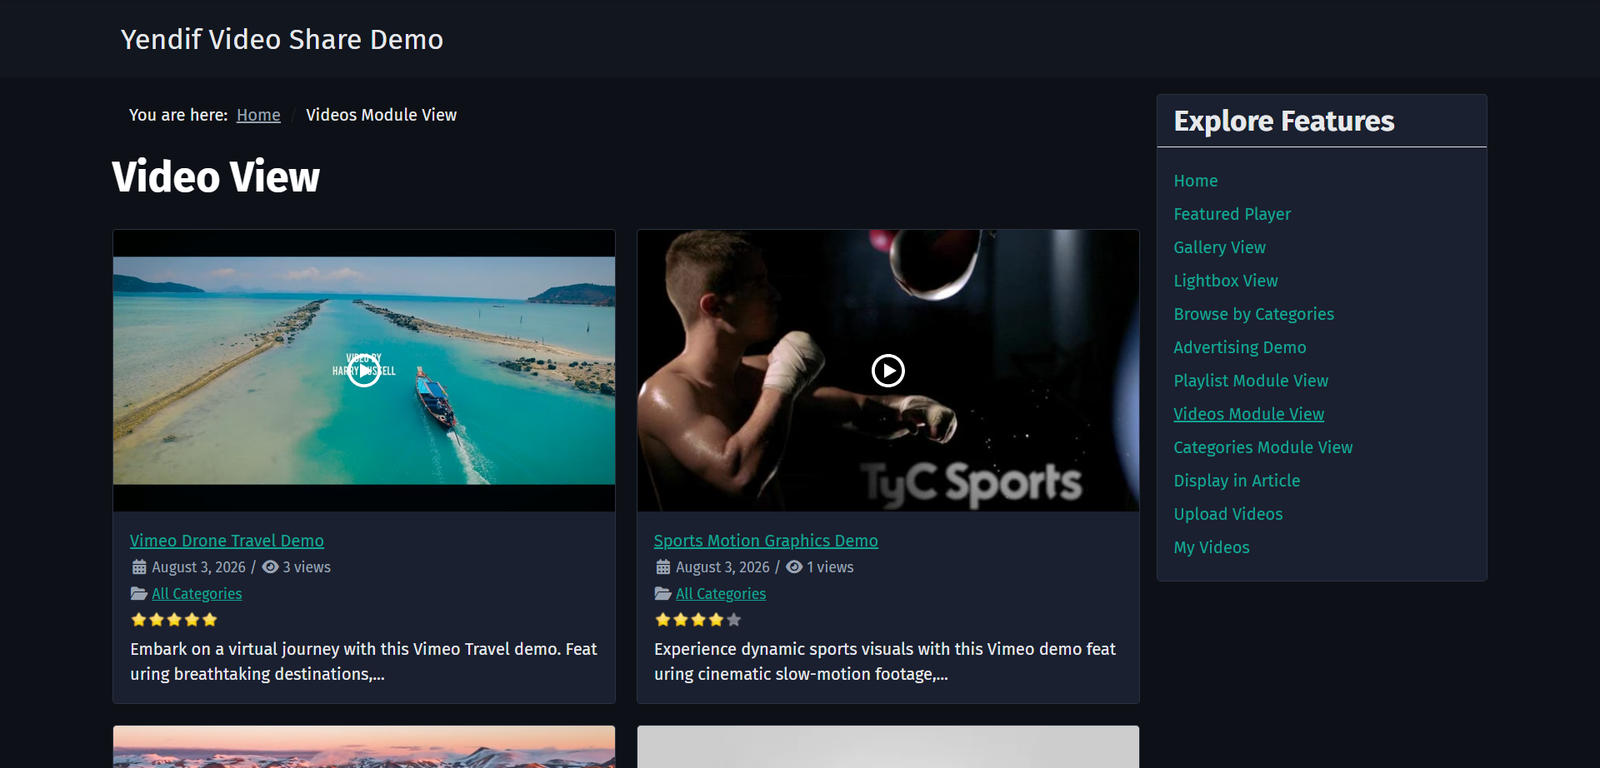
Three videos in a row on your homepage, pulled from a category of your choosing, with a More Videos button underneath that takes visitors to the full gallery.
Before you start
- At least one category with a few published videos in it. If you have not got that far, work through Set up your first video gallery first.
- A gallery menu item, so the More Videos button has somewhere to point.
- The name of the template position you want to use. You will find the list in System → Site Templates, or just look at the positions your other modules already use.
Step 1: Create the module
1. Select Content → Site Modules → New.
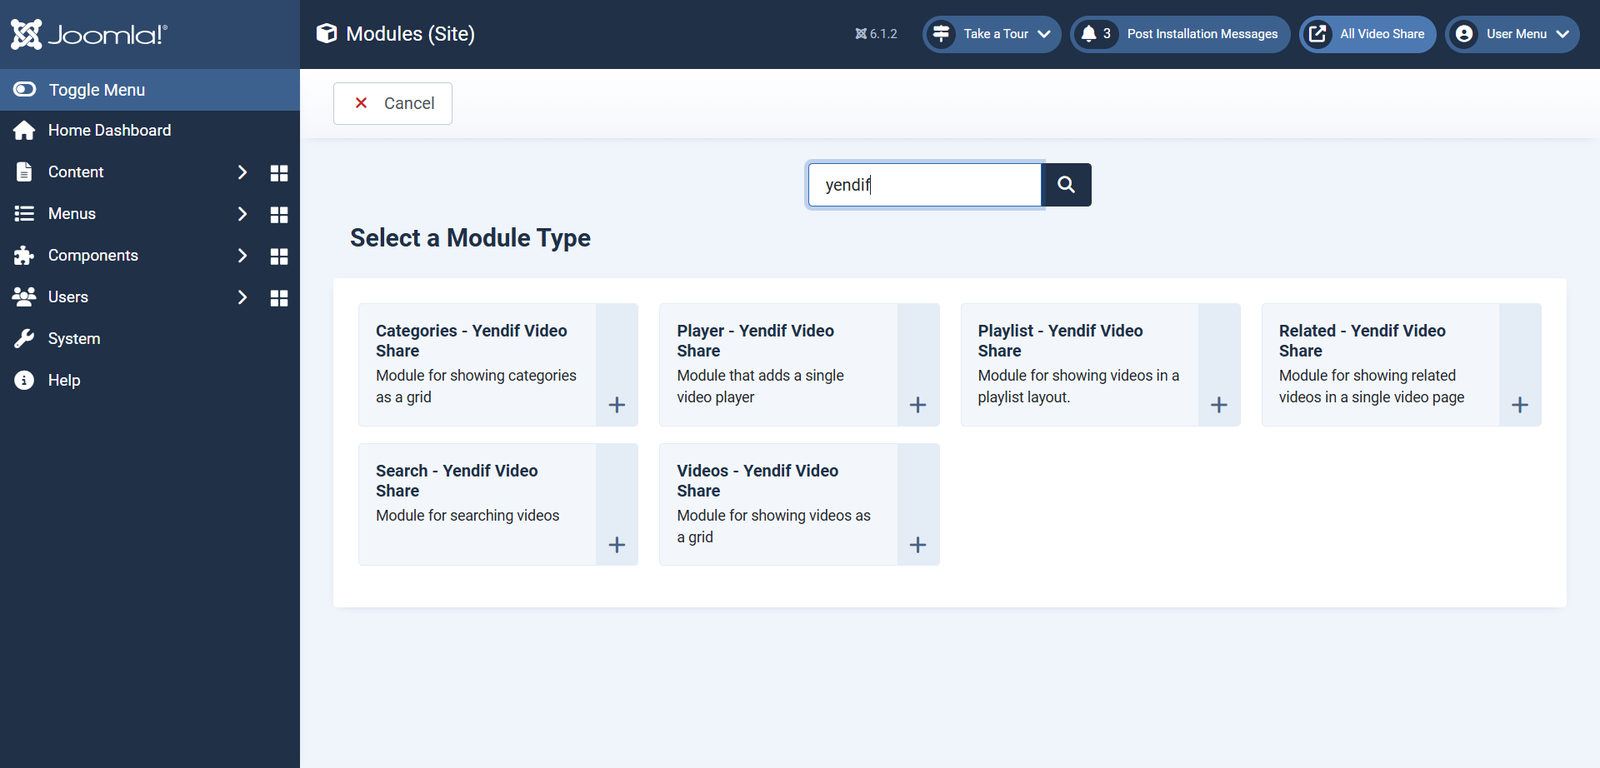
2. Choose Videos – Yendif Video Share from the list of module types.
3. Type a Title, for example Latest Videos. This is the heading shown above the grid, so write it for your visitors.
Six Yendif modules are installed. This guide covers Videos and Categories, the two that show grids. The other four are covered in Build a player with a playlist and Get your videos found in search.
Step 2: Choose which videos appear
Stay on the Module tab and set these five. They decide what the grid contains and how big it is.
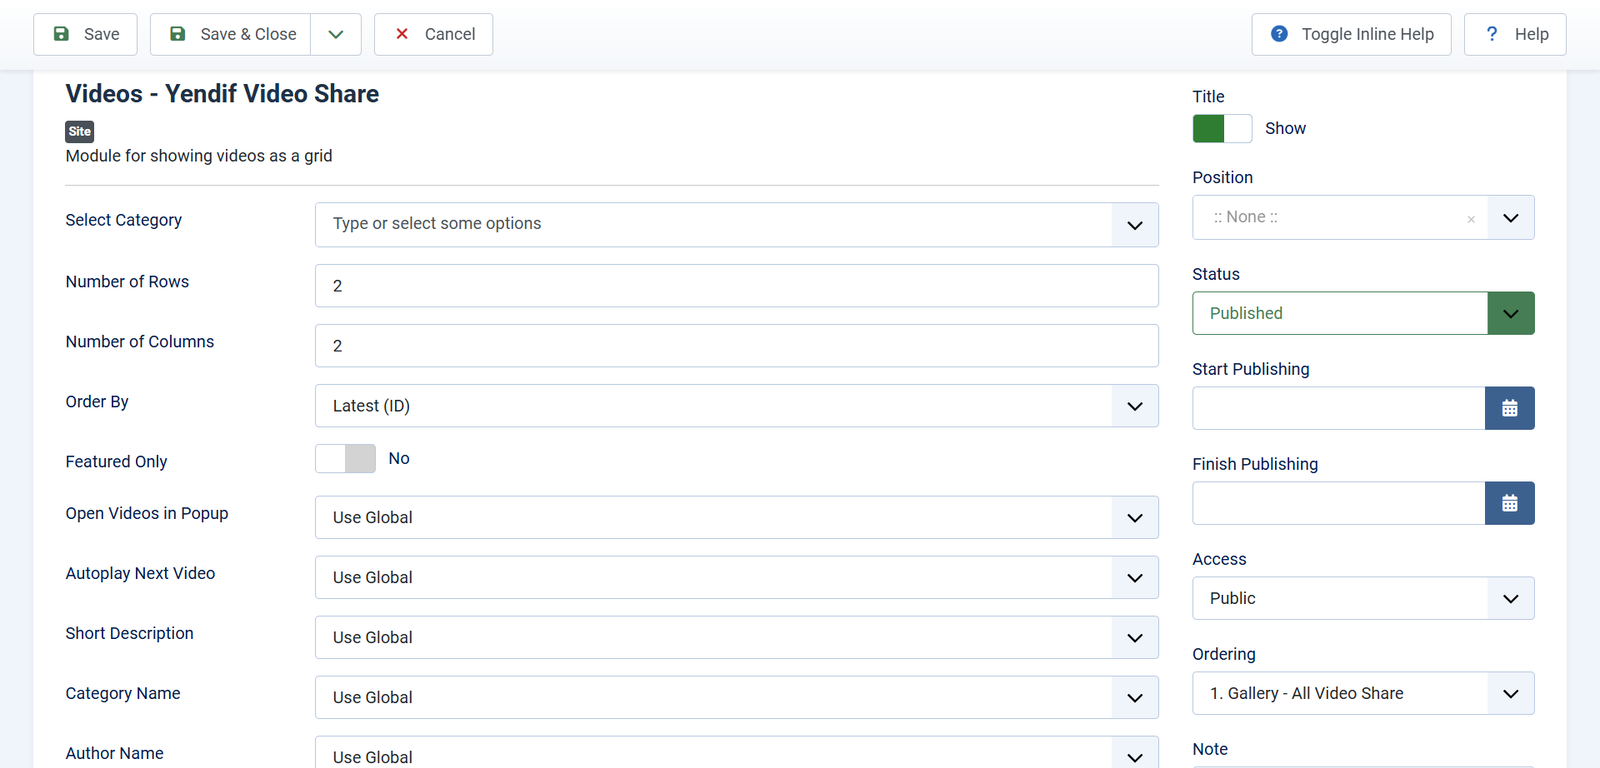
- Select Category — which categories to pull videos from. You can pick several. Leave it empty to draw from your whole library. Set it to your chosen category.
- Number of Rows — how many rows of videos to show. Set it to 1.
- Number of Columns — how many videos per row. Set it to 3.
- Order By — which videos come first. See the list further down. Set it to Latest (Date).
- Featured Only — show only videos you have marked as Featured. Set it to No.
Rows times columns is your total. One row of three columns gives you three videos. Two rows of three gives you six. There is no separate limit setting.
Combine Featured Only with the Featured switch on each video and you get a hand-picked homepage row that you control from the Videos list, without ever reopening the module.
Order By options
- Latest (ID) — the most recently added video first. Simple and reliable.
- Latest (Date) — newest by the video’s Created Date. The better choice if you back-date videos or import them from YouTube with their original dates.
- Most Viewed — for a popular videos block.
- Most Rated — for a top rated block, if you have ratings switched on.
- Title Ascending and Title Descending — for an alphabetical listing.
- Random — a different selection on every page load. Good for discovery, and for keeping a homepage feeling alive.
- Custom Ordering — the exact order you set by dragging rows in the Videos list. Use this for a course or a series.
Step 3: Choose what shows on each thumbnail
Further down the same tab is a set of switches controlling the text under each thumbnail. Every one starts at Use Global, meaning it follows your component options — so you only change what should be different here.
- Short Description — an excerpt from the video description, under the title.
- Category Name — which category the video belongs to.
- Author Name — the user credited on the video.
- Date Added — the video’s date.
- Views Count — how many times it has been watched.
- Ratings — the star rating. Premium feature.
- Open Videos in Popup — play in a lightbox rather than opening the video page. Premium feature.
- Autoplay Next Video — when a popup video ends, move to the next one automatically.
In a narrow sidebar, turn most of these off. A thumbnail with a title and a view count reads cleanly at 250 px wide. The same thumbnail carrying an excerpt, a category, an author and a date does not.
Step 4: Add a More Videos button
A homepage row should lead somewhere. This button is how visitors get from three videos to your whole gallery.
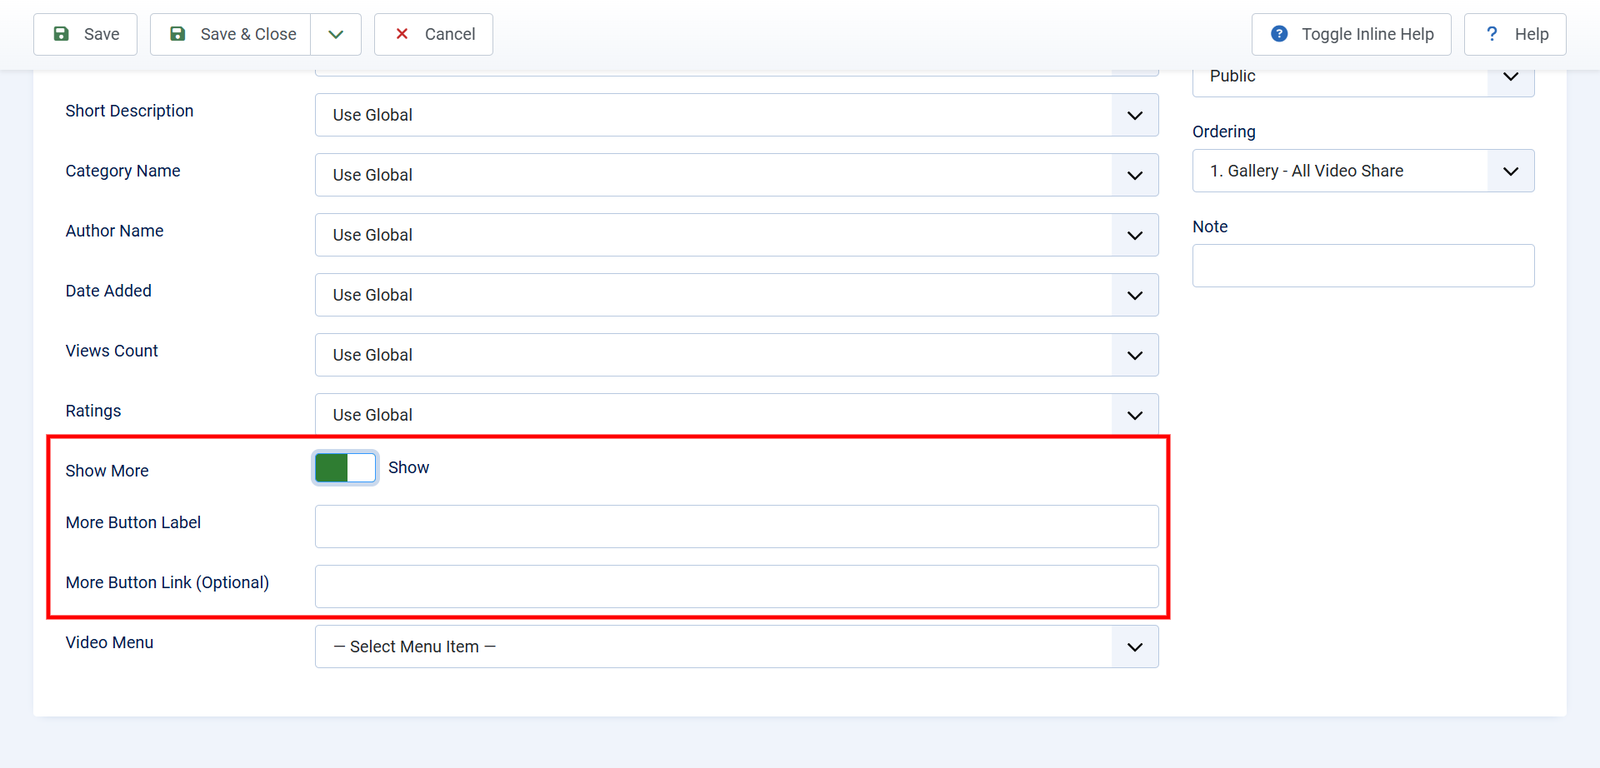
1. Set Show More to Show. Two more fields appear.
- Show More — shows a button under the grid. Default: Hide.
- More Button Label — the text on the button. Leave it empty to use the built in wording. Default: More Videos.
- More Button Link (Optional) — where the button goes. Leave it empty and the module works out your gallery page for itself. Default: empty.
- Video Menu — which menu item a thumbnail opens. Set this to your Videos Layout menu item. Default: — Select Menu Item —.
2. Set Video Menu to the menu item that shows a single video — the one built with the Videos Layout.
Video Menu is worth setting even though it is optional. Without it, the module has to guess which page a thumbnail should open, and on a site with several Yendif pages it can guess wrong — sending visitors to a page with the wrong template or the wrong modules around it.
Step 5: Place it and publish it
This is the part people forget. A module with no position and no menu assignment is saved but invisible.
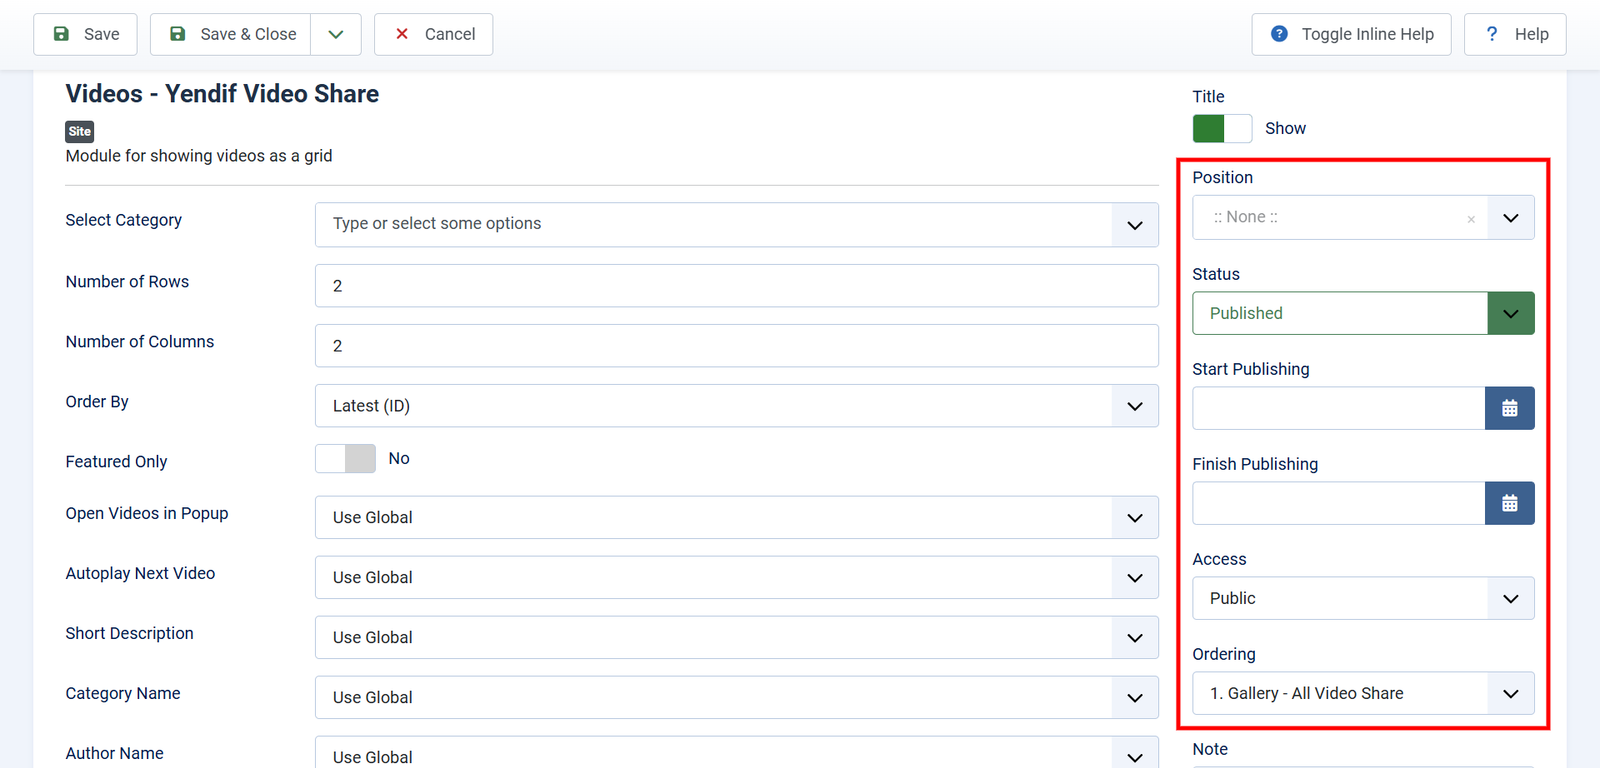
1. In the right hand column, click Position and choose a position from your template. For a homepage feature row this is usually something like top-a or featured.
2. Check Status is Published and Access is Public.
3. Open the Menu Assignment tab and choose where the module appears. For a homepage row, select Only on the pages selected, clear the list, then tick your Home menu item.
4. Click Save & Close.
Check it worked: open your homepage. You should see your module title, three video thumbnails in a row, and a More Videos button underneath. Click a thumbnail — it should open the video page.
If it did not
- Nothing at all. No position chosen, the module is unpublished, or the wrong pages are assigned. Check Position, Status and the Menu Assignment tab.
- “No items found.” The chosen category has no published videos, or Featured Only is on and nothing is marked featured. Publish some videos in that category, or set Featured Only to No.
- Thumbnails are squashed or overlapping. Too many columns for the width of the position. Lower Number of Columns — in a sidebar use 1.
- It appears on every page. Menu Assignment is set to On all pages. Switch to Only on the pages selected and tick just Home.
Now do the same for your sidebar
A sidebar is a narrow column, so the same module needs different numbers. Create a second Videos module — do not reuse the first one, since a module can only hold one position and one set of settings.
Set it up like the homepage row, with these differences:
- Number of Columns — 1 instead of 3.
- Number of Rows — 4 instead of 1.
- Short Description, Category Name and Date Added — all set to Hide.
- Views Count — leave it showing. It is short enough to fit.
- Menu Assignment — On all pages, rather than Home only.
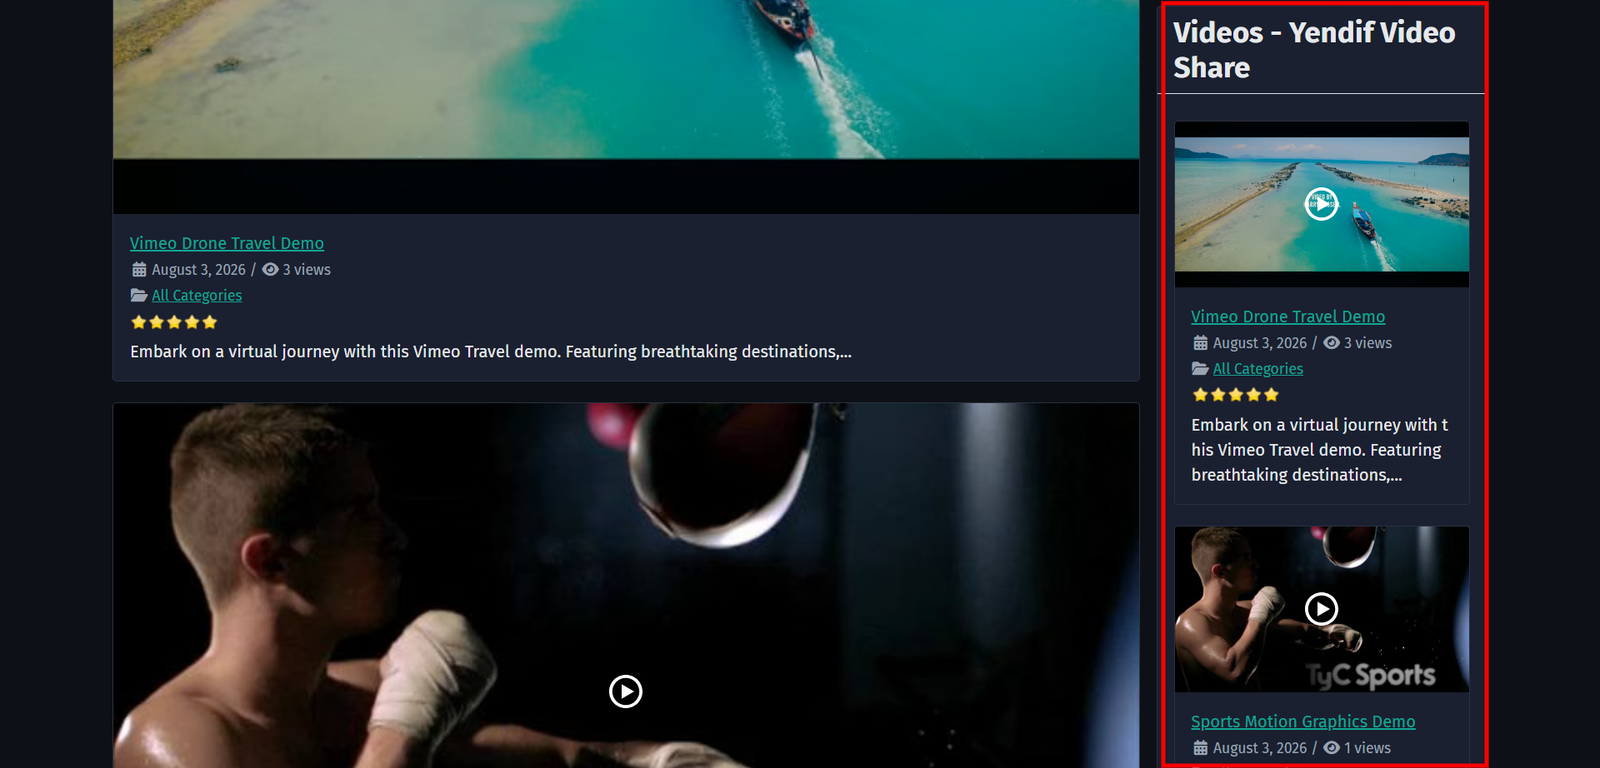
Add as many Videos modules as you like. A homepage row, a sidebar block and a footer strip are three modules, each with its own category, order and position. They do not interfere with each other.
Showing categories instead of videos
Sometimes you want to send visitors to a topic rather than a single video. The Categories module shows a grid of category tiles, each with its image, title and video count.
1. Select Content → Site Modules → New and choose Categories – Yendif Video Share.
2. Set it up using the list below.
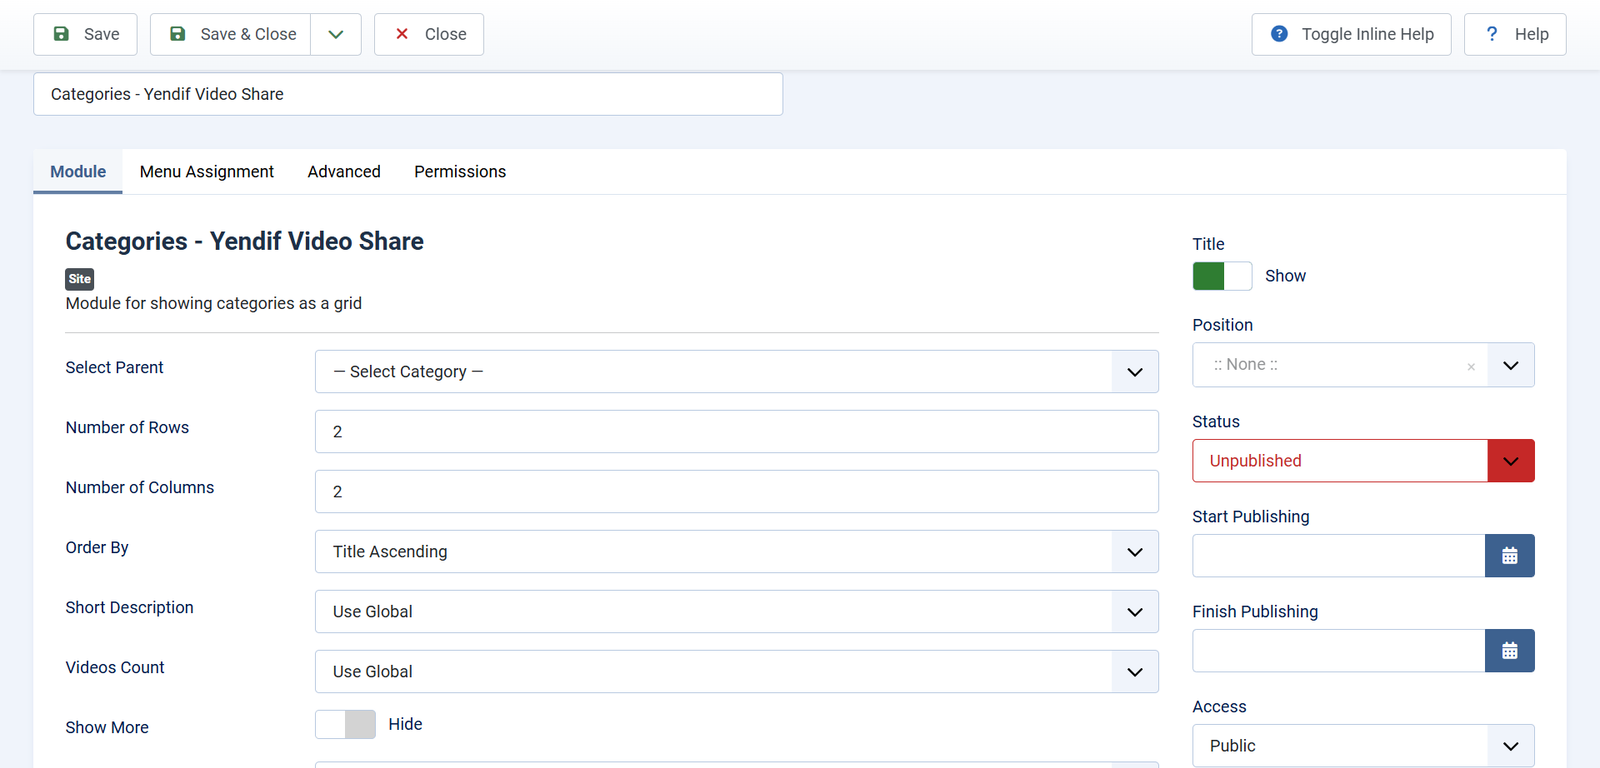
- Select Parent — leave empty to show your top level categories. Choose a category to show its children instead. Default: — Select Category —.
- Number of Rows — rows of category tiles. Default: 2.
- Number of Columns — tiles per row. Default: 2.
- Order By — defaults to alphabetical, which suits a directory. Latest, Random and Custom Ordering are also available. Default: Title Ascending.
- Short Description — an excerpt of the category description. Default: Use Global.
- Videos Count — how many videos are in the category. Includes videos in its sub categories. Default: Use Global.
- Show More — a button under the grid, labelled More Categories by default. Default: Hide.
- Category Menu — which menu item a tile opens. Set this to your Categories Layout menu item. Default: — Select Menu Item —.
3. Choose a Position, set the Menu Assignment, then Save & Close.
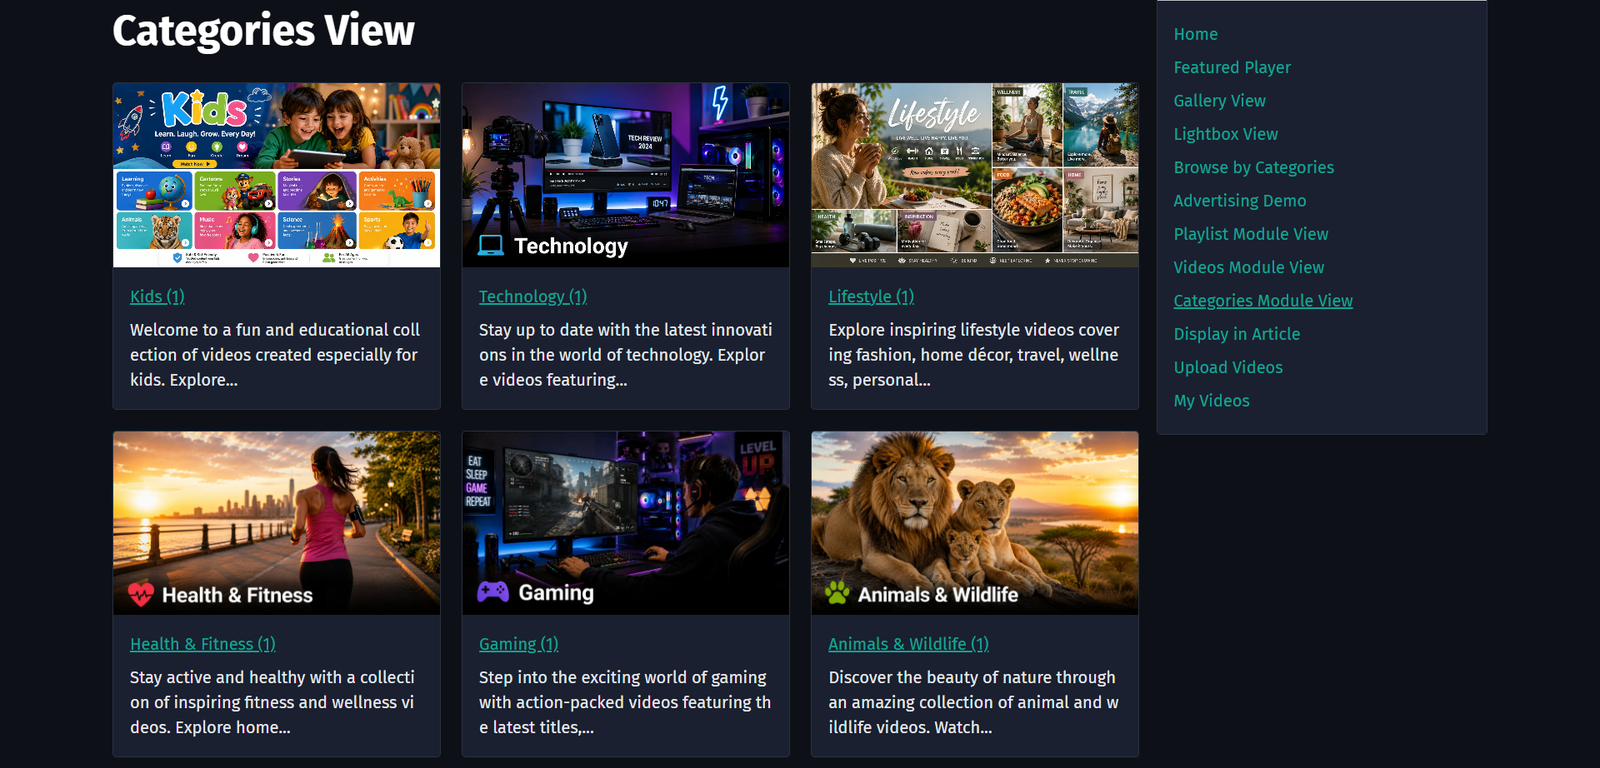
The field is called Select Parent, not Select Category, and it takes one category rather than several. That is because you are choosing a branch of the tree to show, not a set of items to gather.
Five modules worth building
- Featured on the homepage — a Videos module with Rows 1, Columns 3 and Featured Only set to Yes. Assigned to Home only.
- Latest videos in the sidebar — a Videos module with Rows 4, Columns 1 and Order By set to Latest (Date). On all pages.
- Most popular — a Videos module with Order By set to Most Viewed. Works well in a footer.
- Browse by topic — a Categories module with Select Parent empty, Columns 3 and Videos Count showing.
- Related by category — a Videos module with Order By set to Random and one category selected. Assign it to that category’s page.
Every module has a Module Class Suffix on its Advanced tab. Put a name in there, such as
homepage-videos, and you can style that one placement from your template CSS without affecting any other.
What to try next
- Build a player with a playlist
To put an actual player in a position, not a grid of thumbnails. - Add a video to any article or page
To drop a video into an article or any other page. - Change how your gallery looks
To change thumbnail sizes, badges and grid spacing everywhere at once. - Settings reference
To look up any module or component setting in detail.